


Metallographic Cutting, Mounting, Grinding And Polishing: A Complete Workflow
Metallographic Cutting, Mounting, Grinding And Polishing: A Complete Workflow
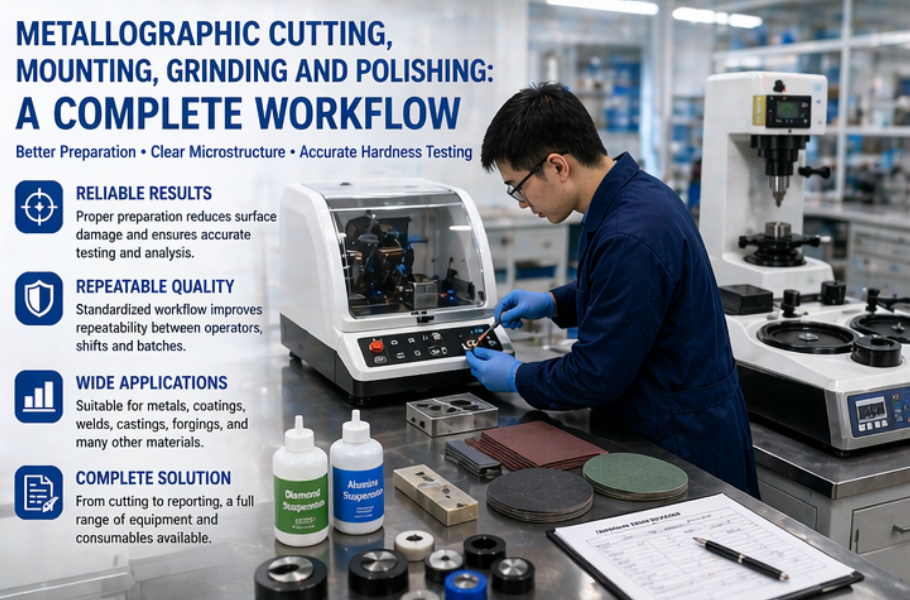
Metallographic sample preparation is a complete workflow that includes cutting, mounting, grinding, polishing, cleaning, and final inspection. For hardness testing, microstructure analysis, coating evaluation, weld inspection, and quality control laboratories, each step must be controlled to produce a flat, clean, representative, and damage-free sample surface.
Cutting
Obtain a representative section while reducing heat damage and deformation.
Mounting
Support small, thin, irregular, or delicate samples for preparation and testing.
Grinding
Remove cutting damage and create a flat surface with controlled scratches.
Polishing
Produce a clean surface suitable for microscope observation and hardness testing.
Metallographic sample preparation is not only a laboratory routine. It directly affects the reliability of hardness testing, microstructure observation, coating inspection, case depth analysis, weld evaluation, and failure analysis. A poorly prepared sample may show scratches, deformation, pull-out, edge rounding, contamination, or heat damage. These problems can lead to unclear microscope images and unstable hardness values. A complete workflow usually includes sample cutting, mounting, grinding, polishing, cleaning, and final inspection. Each step must be matched to the sample material, size, hardness, heat sensitivity, and testing purpose. For example, a heat-treated steel part, aluminum casting, welded section, ceramic coating, and small electronic component may require different preparation methods and consumables. For industrial buyers setting up a quality control laboratory, the preparation workflow should be planned together with the hardness tester or metallographic microscope. Buying only one machine without considering the full process often leads to inconsistent sample quality and inefficient testing. Cutting is the first step in sample preparation. The purpose is to obtain a representative sample section without changing the material structure. If the cutting process creates excessive heat, deformation, burning, cracking, or smearing, later grinding and polishing may not fully remove the damaged layer. This can affect both microscopic observation and hardness testing. A metallographic cutting machine should provide stable clamping, suitable cutting speed, proper coolant flow, and compatibility with different cutting wheels. For hard steel, alloy materials, castings, and heat-treated samples, the cutting disc must be selected carefully to reduce heat and mechanical damage. For small parts or fragile samples, secure clamping is especially important.1. Why A Complete Metallographic Workflow Matters
2. Step One: Metallographic Cutting
Cutting Requirement Why It Matters Buyer Checkpoint Low heat generation Prevents hardness change and microstructure damage Check coolant system and cutting wheel selection Stable clamping Reduces vibration, cracking, and uneven cuts Confirm fixture options for irregular samples Proper cutting capacity Matches sample size and material type Check maximum cutting diameter and chamber space Controlled feed Helps reduce deformation and surface damage Manual or automatic feed should match workload
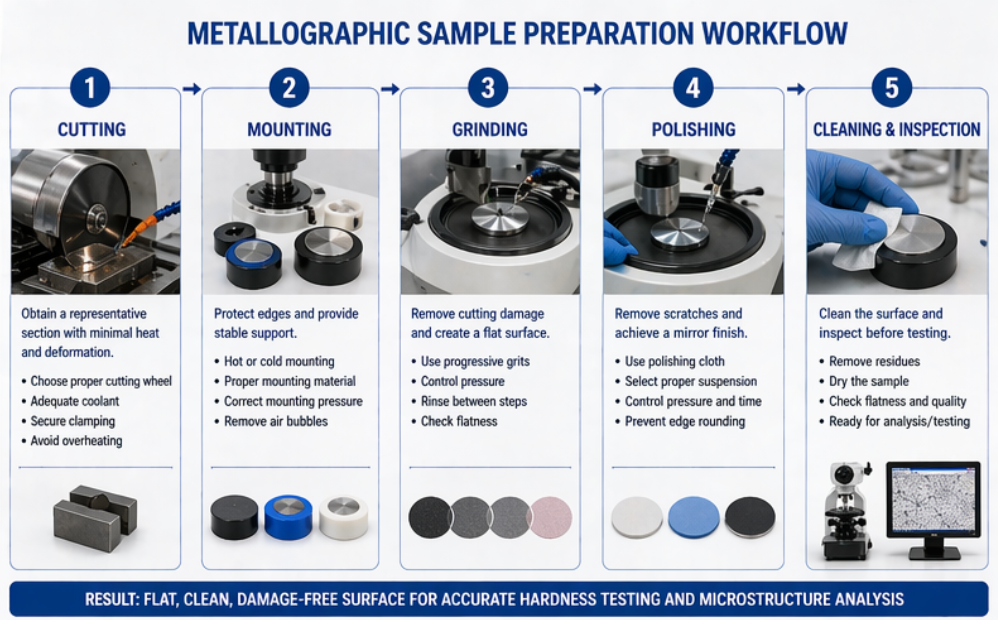
Mounting is used to protect and support samples during grinding, polishing, observation, and hardness testing. Small, thin, irregular, sharp-edged, or delicate samples are difficult to prepare without mounting. A mounted sample is easier to hold, easier to keep flat, and safer to process. There are two common mounting methods: hot mounting and cold mounting. Hot mounting is efficient and provides strong edge support for many metal samples. Cold mounting is useful for heat-sensitive materials, fragile coatings, electronics, porous materials, and samples that cannot tolerate pressure or temperature. For hardness testing, mounting quality is important because the sample must remain stable under indentation load. For coating thickness, case depth, and weld cross-section analysis, edge retention is also critical. Poor mounting may cause edge rounding, gaps, sample tilt, or unstable test positioning. Grinding removes cutting damage and creates a flat surface for final polishing. It is usually performed with a sequence of abrasive papers or grinding discs, moving from coarse to fine grit. The goal is to remove the damaged layer step by step while avoiding new deep scratches, overheating, or uneven material removal. During grinding, pressure, water flow, rotation speed, sample movement, and grit sequence must be controlled. Too much pressure can deform soft materials or round sample edges. Too little grinding may leave cutting marks that appear again during polishing. For high-throughput laboratories, automatic grinding and polishing machines can improve consistency and reduce operator variation. Remove cutting damage completely. Create a flat surface before polishing. Use a progressive abrasive sequence. Control pressure to avoid deformation. Rinse samples between grinding steps. Keep sample edges sharp when edge retention is required. Polishing removes fine scratches from grinding and produces a surface suitable for microscope observation or hardness testing. A well-polished sample helps reveal microstructure clearly and makes indentation edges easier to identify. This is especially important for Vickers and Micro Vickers hardness testing, where the diagonal measurement must be accurate. Polishing typically uses polishing cloths, diamond suspension, alumina suspension, colloidal silica, or other consumables depending on the material. The correct polishing method depends on material hardness, ductility, phase structure, and analysis purpose. Soft materials may smear if pressure is too high. Hard particles may pull out if the polishing method is not suitable. For industrial laboratories, stable polishing quality is more important than simply achieving a shiny surface. The surface should be flat, clean, scratch-controlled, and free from deformation that could affect hardness results.3. Step Two: Sample Mounting
Mounting Method Best For Main Advantage Buyer Consideration Hot Mounting Most metal samples and routine lab work Fast, strong support, good repeatability Not suitable for heat-sensitive samples Cold Mounting Coatings, electronics, fragile or heat-sensitive materials Lower thermal and pressure influence Longer curing time and material selection needed 4. Step Three: Grinding
Good grinding practice should:
5. Step Four: Polishing
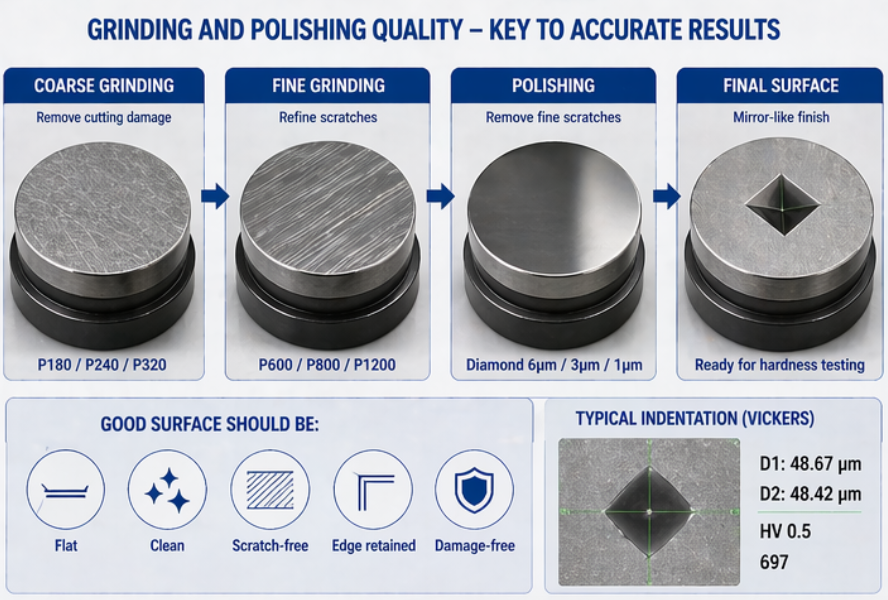
After polishing, samples should be cleaned to remove abrasive particles, polishing residue, coolant, oil, and dust. Residue on the surface can interfere with optical observation and indentation measurement. For microhardness testing, even small contamination can make the indentation edge unclear. Common cleaning methods include rinsing, alcohol cleaning, ultrasonic cleaning, and drying with clean air. The selected method should not corrode, stain, or damage the sample surface. Before hardness testing, the surface should be inspected under suitable magnification to confirm flatness, scratch level, cleanliness, and edge condition. Different applications require different preparation priorities. A sample prepared for general microstructure observation may not always be ideal for microhardness testing. A sample prepared for Brinell testing may not need the same mirror finish as a Micro Vickers sample. Buyers should define the final testing purpose before selecting preparation equipment and consumables. Many preparation problems appear only after the sample reaches the microscope or hardness tester. At that point, the laboratory may need to repeat cutting, remounting, or repolishing, which wastes time and reduces efficiency. Building a controlled workflow helps prevent these issues. Using the wrong cutting wheel for the sample material. Cutting without enough coolant and causing heat damage. Mounting the sample at an angle or with poor edge support. Skipping abrasive steps during grinding. Using excessive pressure and deforming soft materials. Polishing too long and rounding sample edges. Failing to clean the sample between preparation steps. Using the same workflow for metals, coatings, ceramics, and composites. Testing hardness before checking surface flatness and cleanliness.6. Cleaning And Final Surface Inspection
Final Check Why It Matters What To Look For Surface flatness Supports stable indentation and optical focus No tilt, uneven grinding, or curved surface Scratch control Improves indentation edge recognition No deep scratches across test area Cleanliness Prevents measurement interference No polishing residue, dust, oil, or loose particles Edge retention Important for coating and case depth testing No edge rounding or gaps near the sample boundary 7. Match The Workflow To The Testing Purpose
Application Preparation Focus Recommended Equipment Micro Vickers testing Mirror-like surface and clear indentation edges Precision cutting, mounting, automatic grinding and polishing Coating cross-section Edge retention and layer protection Cold mounting, fine grinding, controlled polishing Weld inspection Flat cross-section across weld zones Cutting machine, mounting press, polishing system Casting and forging analysis Representative section and stable test surface High-capacity cutting and robust grinding equipment 8. Common Workflow Mistakes To Avoid
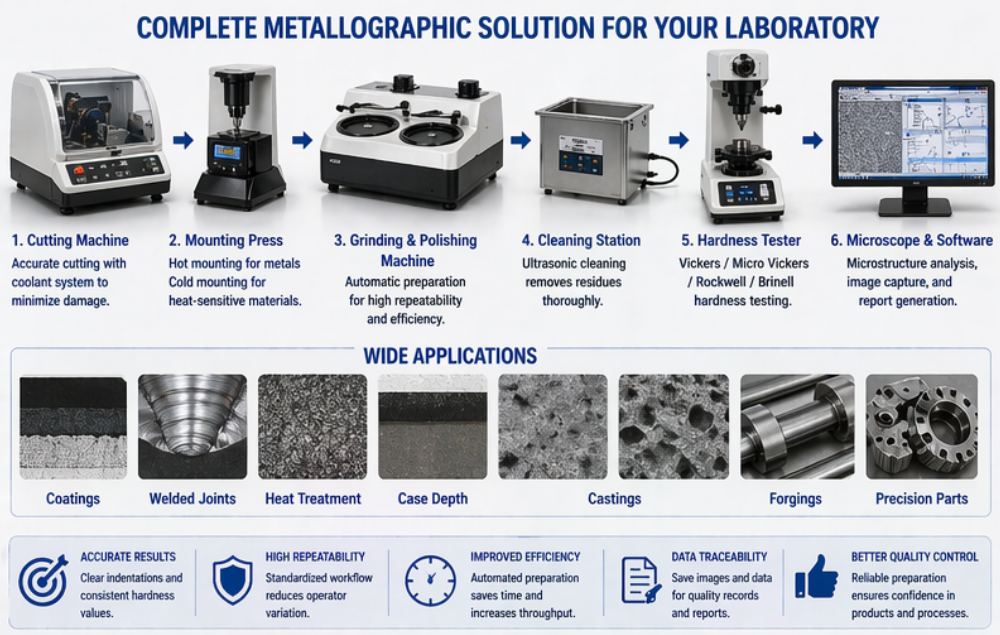
Before choosing metallographic preparation equipment, buyers should provide clear sample and laboratory information. This helps avoid under-configured equipment, wrong consumables, or inefficient workflow design. What materials will be prepared? What sample size and hardness range are expected? Is the sample metal, coating, weld, casting, forging, ceramic, plastic, or composite? Will the sample be used for hardness testing, microscope observation, or both? Is edge retention important? Is the material heat-sensitive or pressure-sensitive? How many samples need to be prepared per day? Do you need manual or automatic grinding and polishing? Do you need hot mounting, cold mounting, or both? Do you need a complete solution including hardness tester and microscope? Metallographic cutting, mounting, grinding, and polishing should be treated as one connected workflow. Each step affects the next step, and the final surface quality directly influences hardness testing accuracy, microscope observation clarity, and laboratory efficiency. A reliable workflow helps laboratories prepare samples with less damage, better flatness, stronger edge retention, clearer indentation visibility, and more repeatable results. For factories and testing centers, this means fewer retests, faster sample turnaround, and stronger quality documentation. When selecting equipment, buyers should consider the complete process instead of purchasing each machine separately without workflow planning. The right combination of cutting machine, mounting press, grinding and polishing machine, consumables, cleaning tools, hardness tester, and microscope can significantly improve laboratory quality control performance. The purpose is to create a flat, clean, representative, and damage-controlled sample surface for hardness testing, microscope observation, microstructure analysis, or quality control inspection. Improper cutting can cause heat damage, deformation, cracks, or structural change. This can affect later polishing, microstructure observation, and hardness testing results. Cold mounting is suitable for heat-sensitive materials, fragile coatings, electronic components, porous samples, and parts that cannot tolerate hot mounting temperature or pressure. For Vickers and Micro Vickers testing, polishing is usually very important because indentation edges must be measured clearly. Rockwell and Brinell testing may require less polishing, but the surface should still be clean and stable.9. Key Questions Before Building A Preparation Workflow
Conclusion: A Reliable Workflow Creates Reliable Test Results
FAQ
What is the main purpose of metallographic sample preparation?
Why is cutting important in metallographic preparation?
When should cold mounting be used?
Is polishing always required before hardness testing?
Need A Complete Metallographic Preparation Workflow?
Share your material type, sample size, testing purpose, daily sample quantity, and required surface quality. We can help recommend a suitable metallographic cutting, mounting, grinding, polishing, and hardness testing solution for your quality control laboratory.